
Generating API Keys
Before you can start using the Orbital API, you'll need to generate an API key. Each organization can have up to 5 active API keys at a time. Here's how to create one:
- Log in to the Orbital Client Portal
- In the left-hand menu, select eCommerce → Configurations. Here you can view Payment Thresholds, API Keys, IP Allow List, and API Approval.
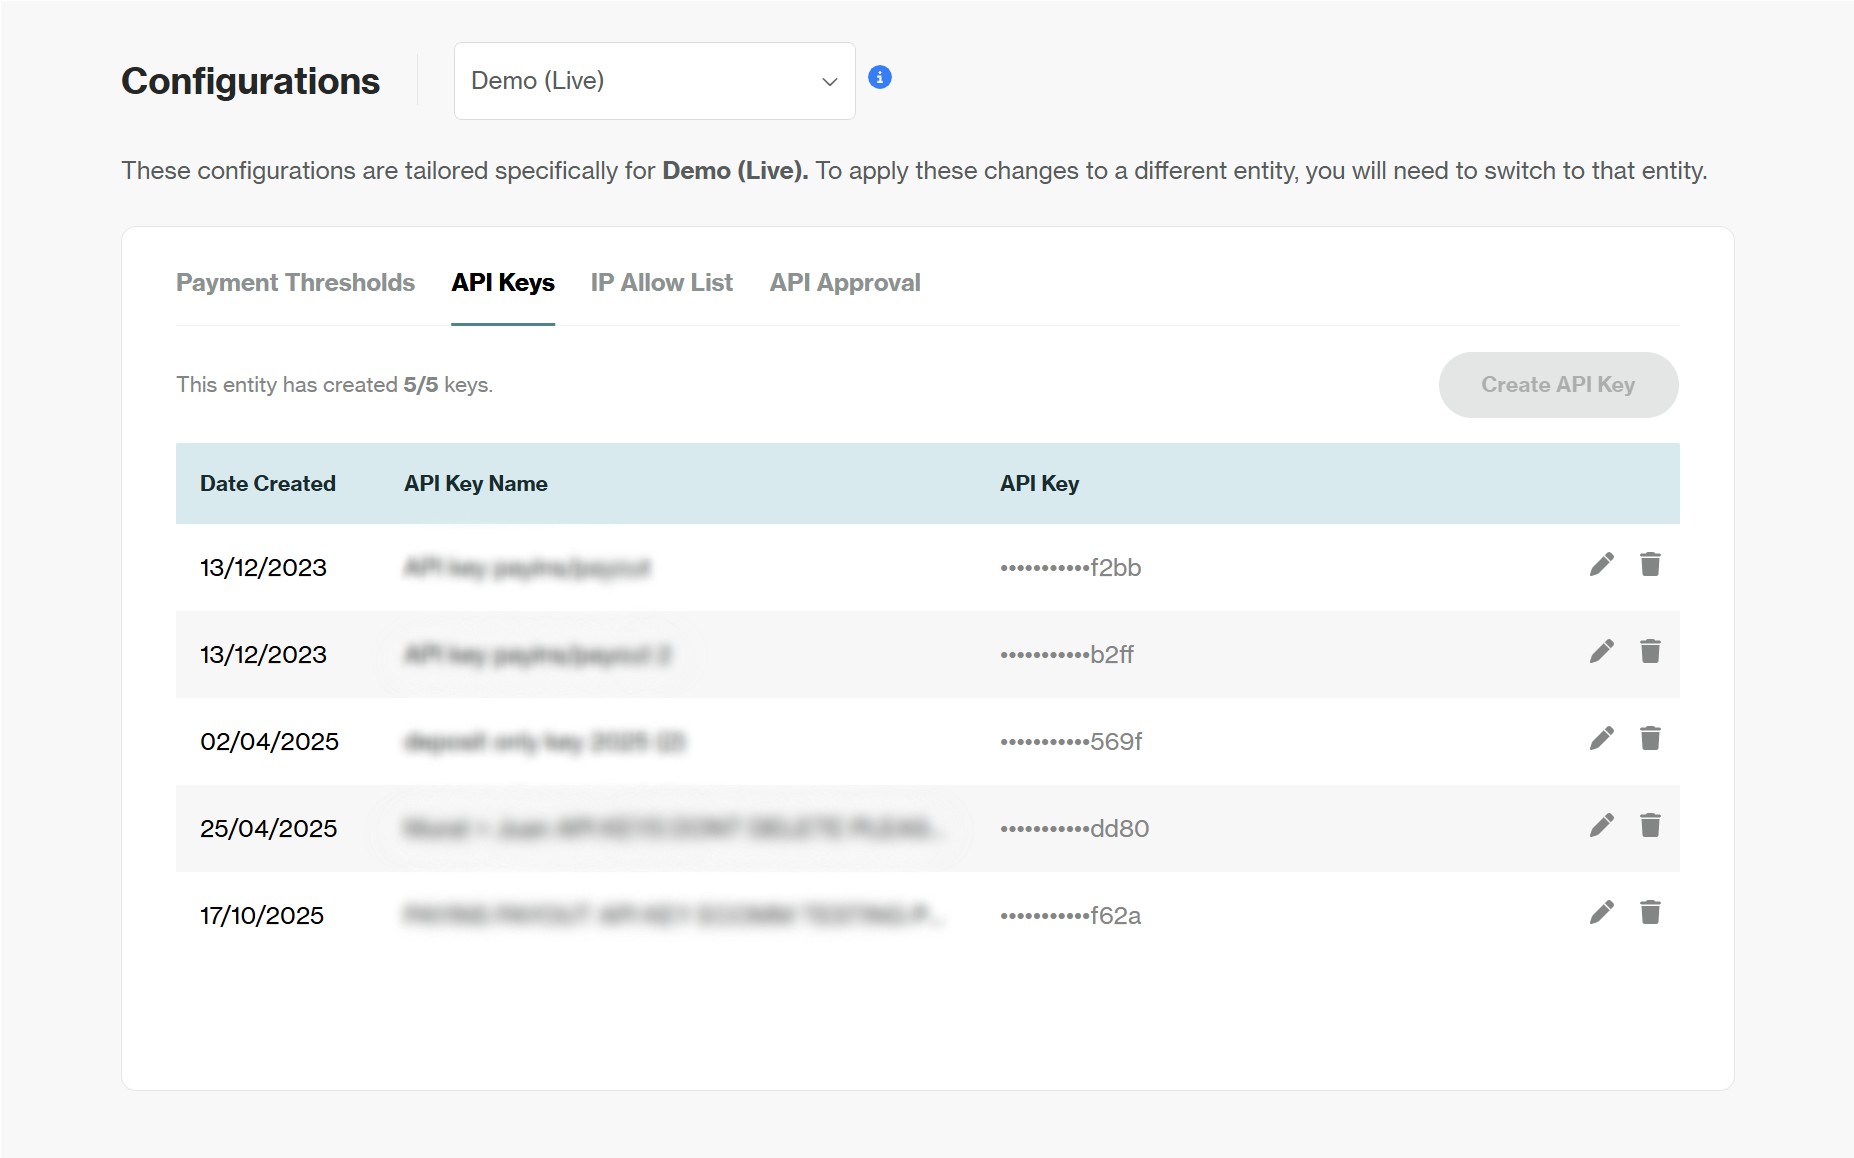
- If you already have 5 active API Keys, you will need to delete one before you can create a new one.
- Click Create API Key.
- Input the API Key Name you would like to associate with this API key.
- You’ll be asked to pick between two options - Pay ins only or Pay ins and pay outs.
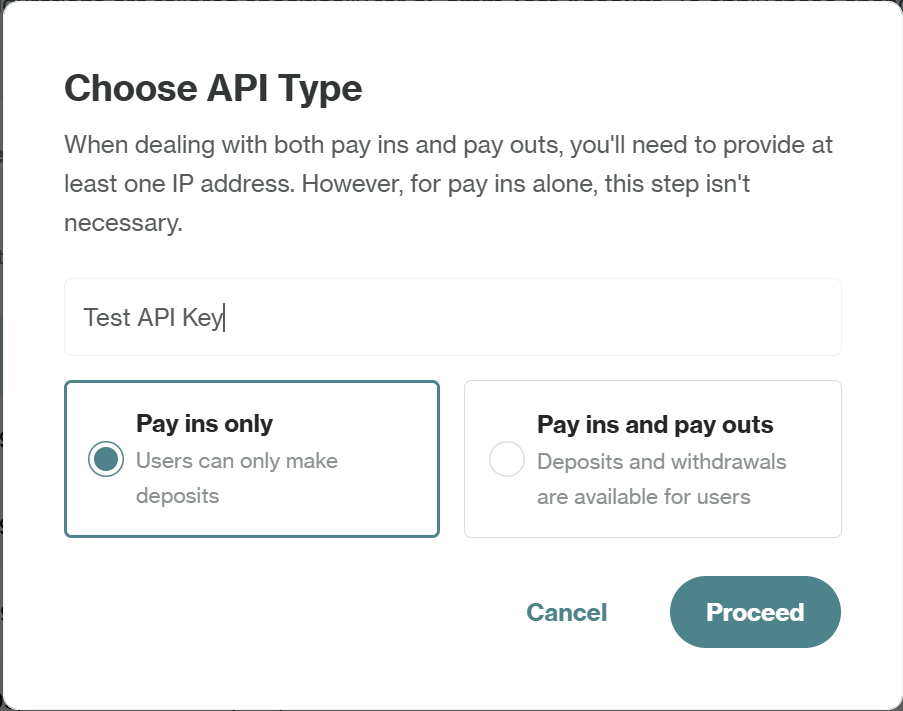
Option A: Pay-ins Only
Select this key type if your integration only needs to receive funds (e.g., customer crypto payments). This key type is considered lower-risk:
- No approval required from other users for its creation
- IP whitelisting is not required
- Well-suited for use in test environments, frontend applications, or read-only use cases
Once selected, name your key and click Proceed. Your new API key will be generated and ready for use in your Pay ins API requests.
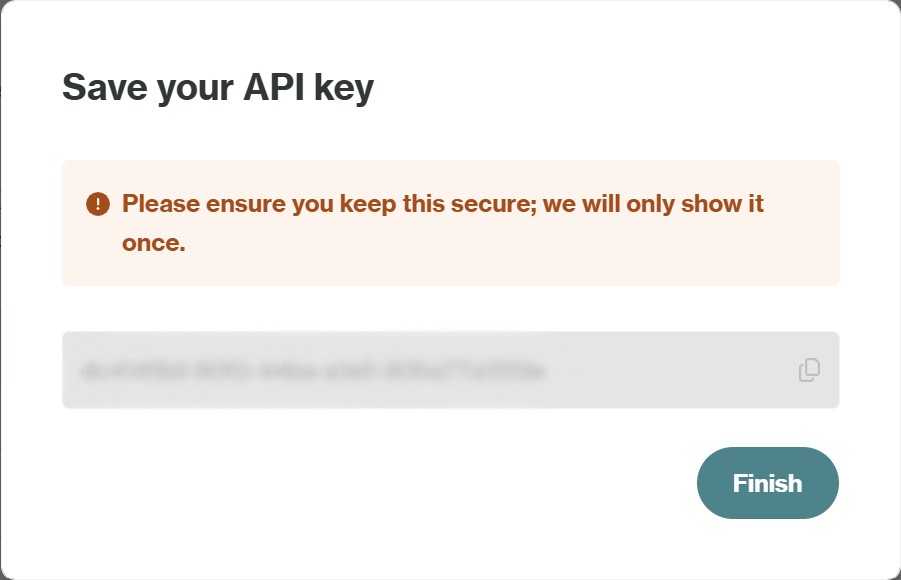
Pay-ins-only keys are more flexible, but still sensitive. The key will only be shown once make sure to store it securely.
Option B: Pay-ins and Pay-outs
Select this key type if your integration requires the ability to both send and receive funds, such as initiating user payouts. Given its expanded functionality, this key type includes more security features and you will be required to:
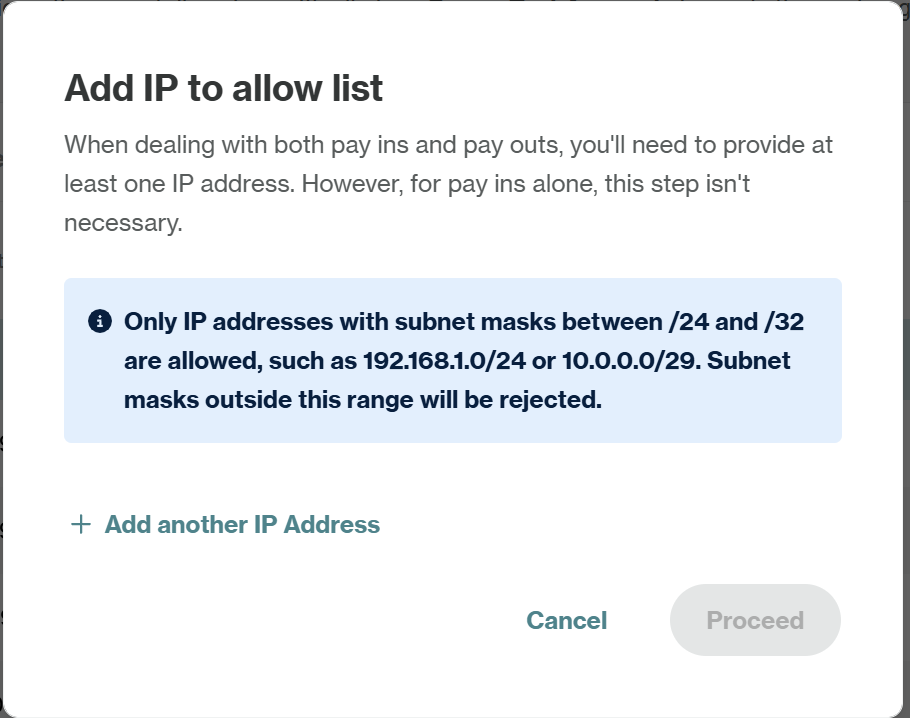
- Whitelist at least one server IP address, limiting access to trusted sources only.
- Get approval from another authorized user on your Orbital account (multi-party authorization).
After entering a name for your key:
- If you do not have any IP addresses in your allow list, you will be required to add at least one IP address at this stage (you can add more later).
- Select Proceed - to ensure security, this API key type requires approval from another user. Once your API key is approved, you will be able to copy it and start using it.
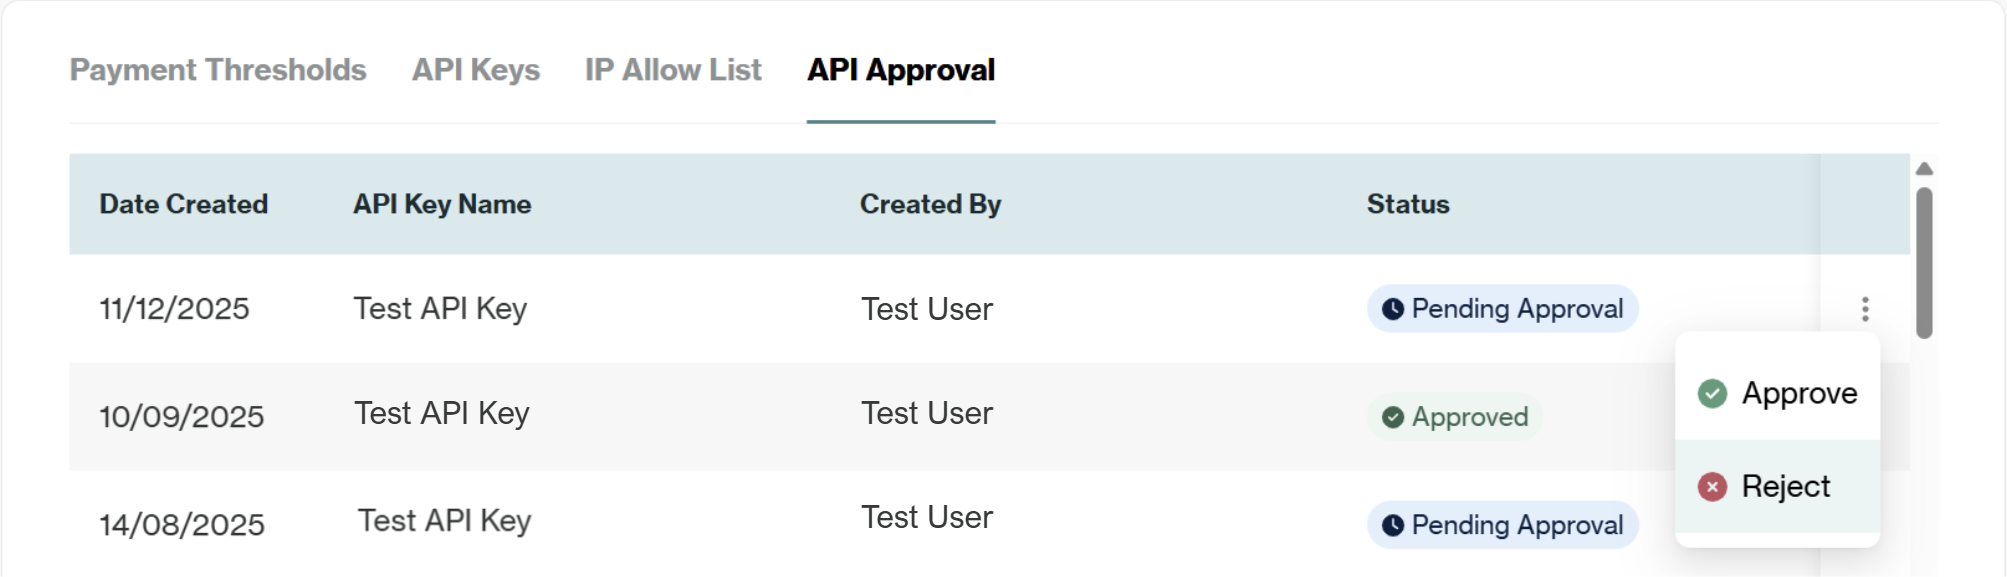
Note that you cannot approve your own Pay-ins and Pay-outs API Key request - click into the API Approval tab to view outstanding keys to be approved. Click the ellipse to either approve or reject the API key request.
- Once your API Key has been approved, copy and store the key securely.
IP whitelisting is implemented to ensure that only requests originating from pre-approved server IP addresses are permitted to access the API.
Only subnet masks ranging from /24 to /32 are accepted. Broader subnet specifications will be rejected.
Add or Manage IP Addresses
If you're using a Pay-ins and Pay-outs key, you'll see an IP Allow List tab. From here, you can view, update, or delete allowed IP addresses.
Select Add IP Address to add a new allowed IP address - you can add more IP addresses at any time e.g. if you are using multiple environments.
Use Your API Key in Requests
Every API request must include your API key in the x-api-key header. If this is missing or incorrect, the request will fail.
x-api-key: YOUR_API_KEY
Troubleshooting
Here's a quick guide to common issues and how to fix them:
| Issue | What it means | How to fix it |
|---|---|---|
| 401 Unauthorized | The request is missing or contains an incorrect API key. | Double-check your x-api-key header |
| Can't see the API key anymore | For security, API keys are displayed only once upon creation. | If the key has been lost, please delete the existing key and generate a new one. |
| You have reached the maximum allowable number of API keys | You have already created the maximum limit of 5 API keys for your account. | To create a new key, you must first delete an unused key to free up a slot. |
Need Help?
If you need assistance at any point contact your Implementation Manager or email us directly at [email protected]