
Account Creation
This section outlines the process for creating new accounts on the platform.
User Roles
Only users with Super Admin and Admin roles can create additional Corporate Accounts and Digital Asset Vaults. You can initiate this process by clicking the '+ New Account' button on the accounts overview screen. For more details, refer to the User Roles Defined section.
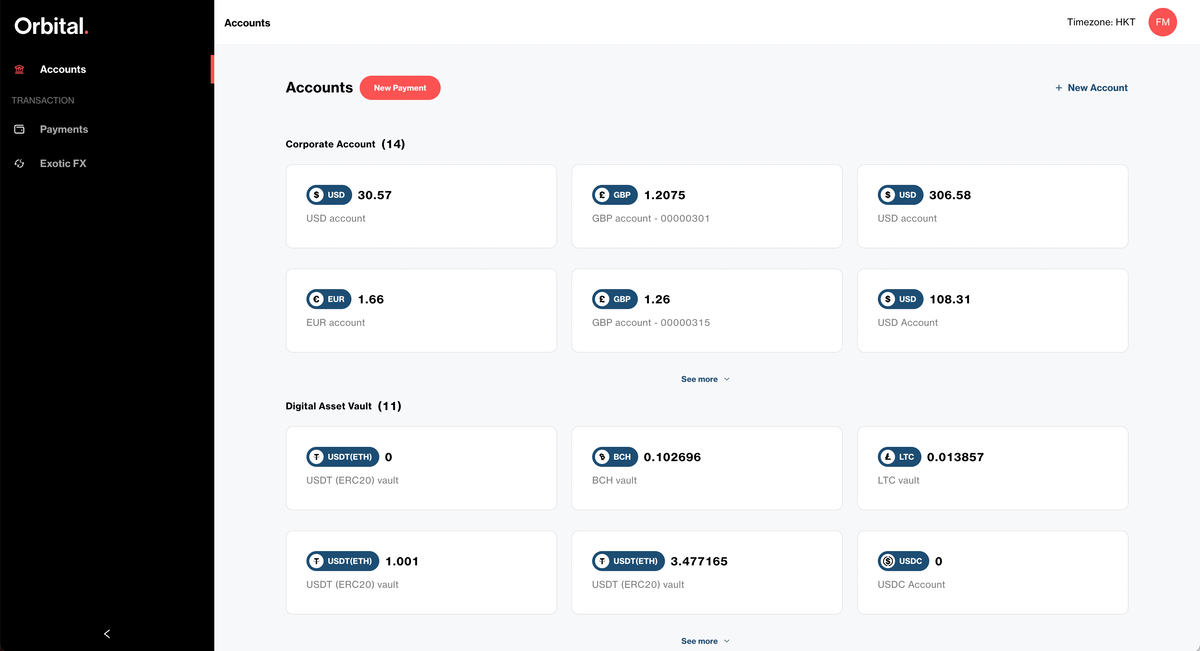
Navigating to Accounts Overview
-
Click on Accounts from the left side navigation menu.
-
To create a new account, click the '+ New Account' button at the top right of the accounts overview screen.
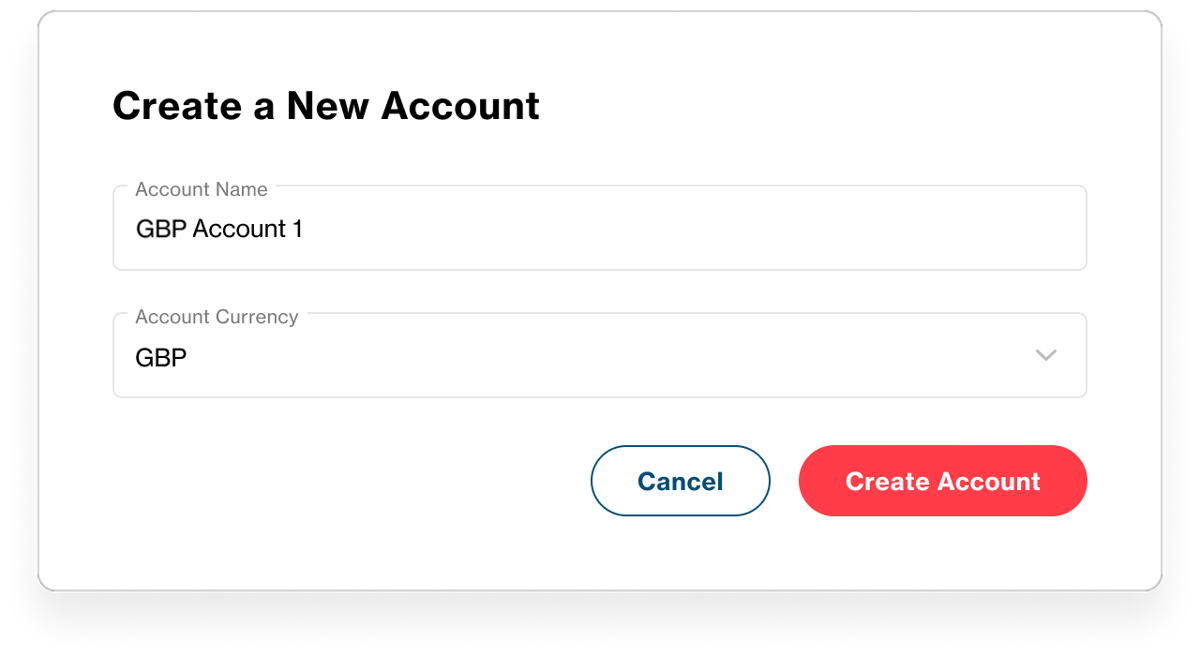
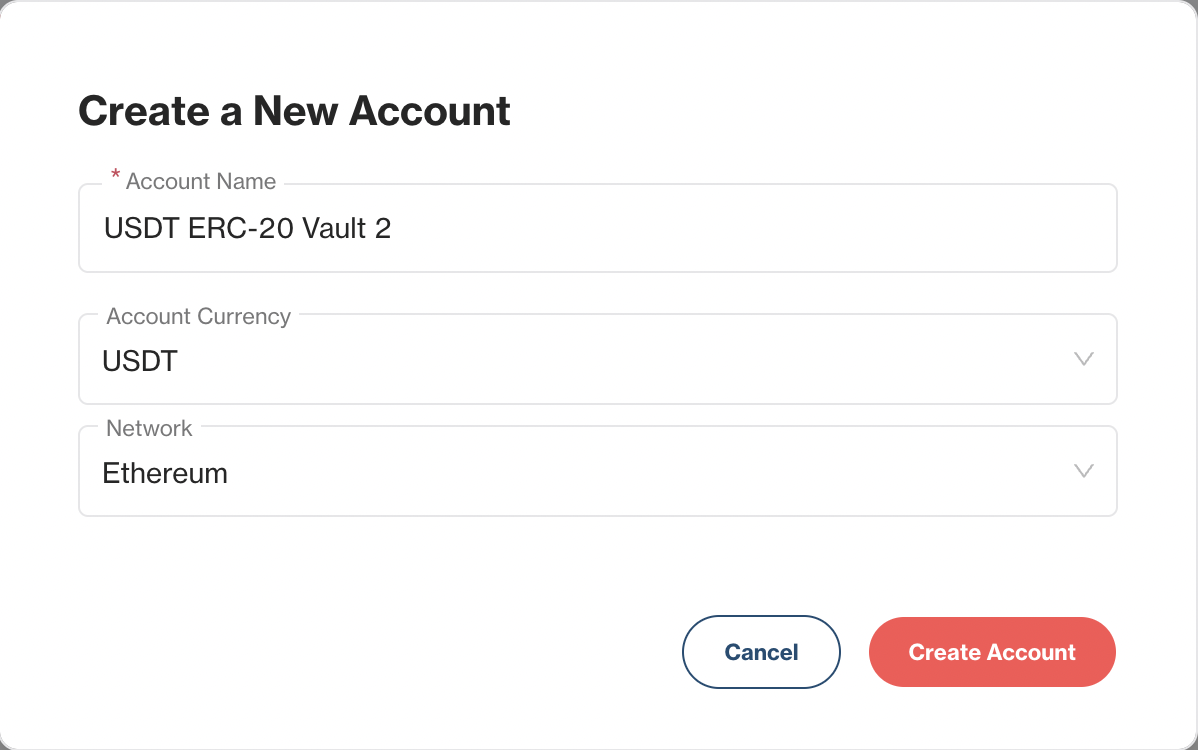
Account Creation Process
Upon clicking the '+ New Account' button, a pop-up window will appear with two basic inputs:
-
Account Name:
- This is an internal label for the account displayed on the account cards, statements, and payment confirmations.
- It is not used for payment processing and will not be sent to the beneficiary for outbound payments.
- For deposits, the customer's registered name should be provided to the payer.
-
Currency:
- Select from a dropdown list of supported currencies for payments and foreign exchange.
- For crypto tokens/stablecoins (e.g., USDT/USDC), a second field will appear to choose the network/blockchain (e.g., Ethereum, Tron).
These inputs are sufficient to create new Corporate Accounts and Digital Asset Vaults.
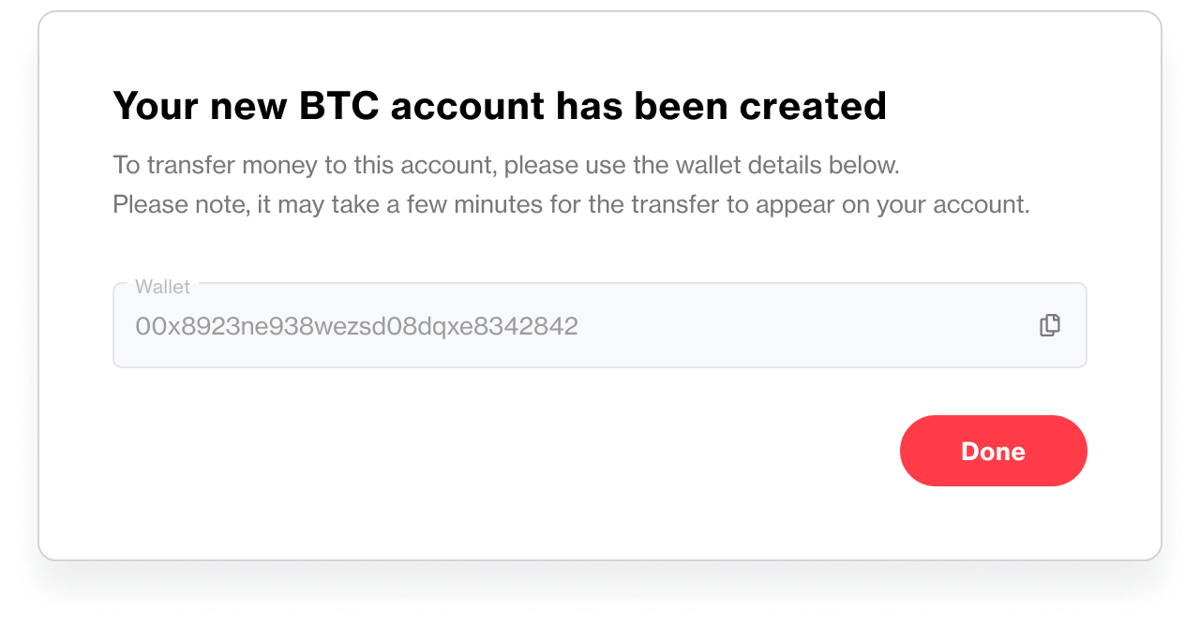
Corporate Account Creation
To create a Corporate Account:
- Click the Create Account button after filling in the account name and currency.
- The new account will be generated within a few seconds.
- Deposit details will be presented and can be copied using the copy button next to each detail.
- The new account will be available immediately for accepting deposits.
Example Corporate Account (GBP) Creation
Click Done to close the account details window. The newly created account will be highlighted on the accounts overview screen.
Digital Asset Vault Creation
To create a Digital Asset Vault, follow the same steps as for creating a Corporate Account but select the appropriate crypto token/stablecoin and network/blockchain during the account creation process.
Changing an Account's Name
- To change an account's name:
- Click on the specific account tile from the accounts overview screen.
- Click the pen icon at the top of the screen where the account's name is displayed.
- Enter the new name in the pop-up window and click Done to apply the new name.
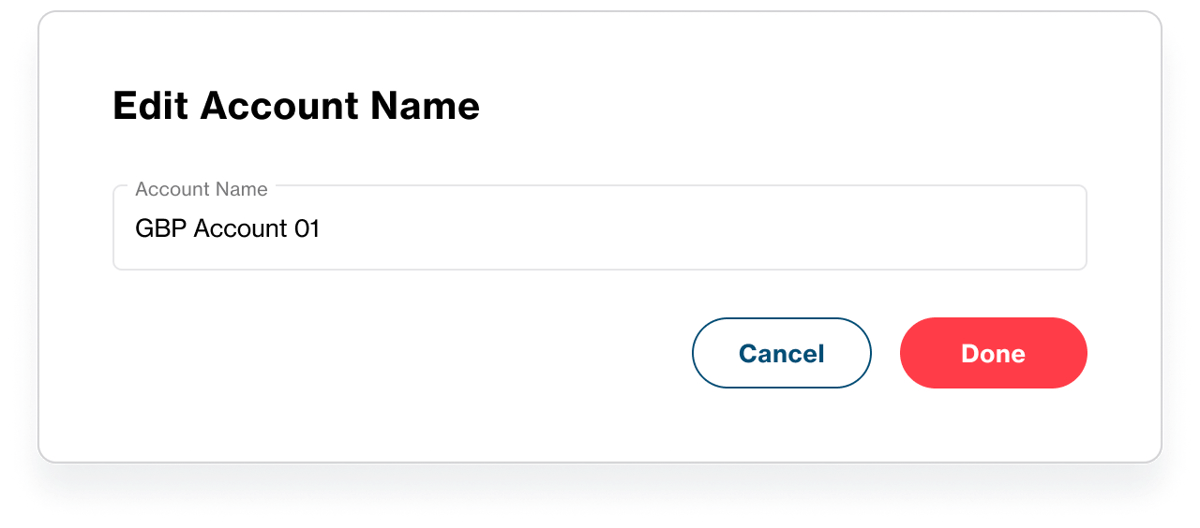
- The account name is used for internal management only and will not be sent to beneficiaries for outbound payments.
- For deposits, the customer's registered name should be provided to the payer.
This process ensures your account names are appropriately labeled for ease of management and that all details are accurately captured for deposits and transactions.
Updated 7 months ago