
WooCommerce Integration
Orbital WooCommerce Integration
The Orbital Pay by Crypto plugin enables your WooCommerce store to accept and process stablecoin and cryptocurrency payments through Orbital's crypto eCommerce payment gateway. With this plugin, your customers can pay with various cryptocurrencies while you:
- Accept stablecoin payments for your online store
- Process refunds directly through WooCommerce
- Track transactions in real-time
- Customize payment options for your customers
Prerequisites
- Active WooCommerce installation
- Orbital merchant account
- Plugin ZIP file (contact your integration manager)
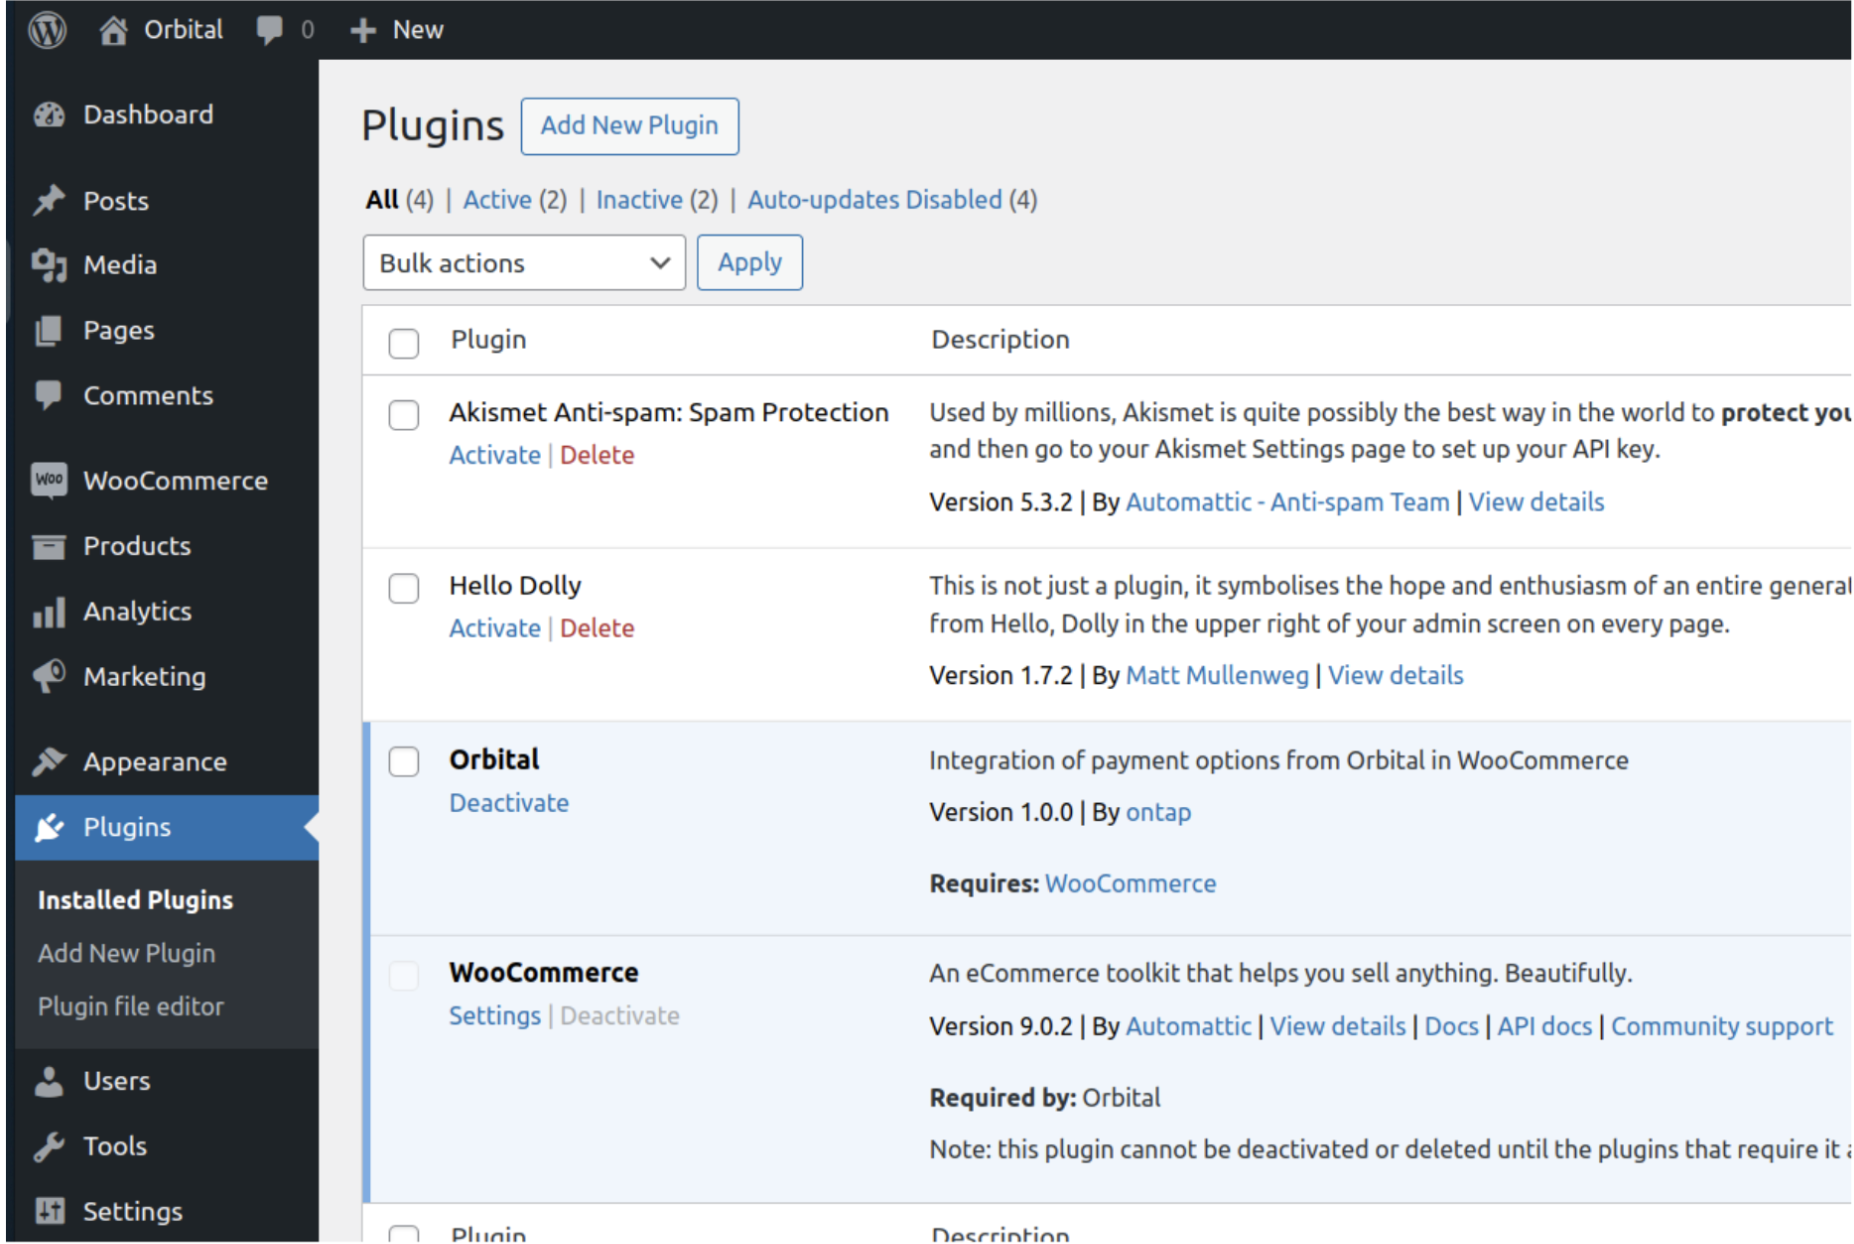
Installation
- Log in to your WordPress admin panel
- Navigate to Dashboard> Plugins > Add New> Upload Plugin
- Select the ZIP file provided by your integration manager from the Wordpress folder
wp-content/plugins/ - Click Install Now
- After installation completes, click Activate
Configuration Payment Method
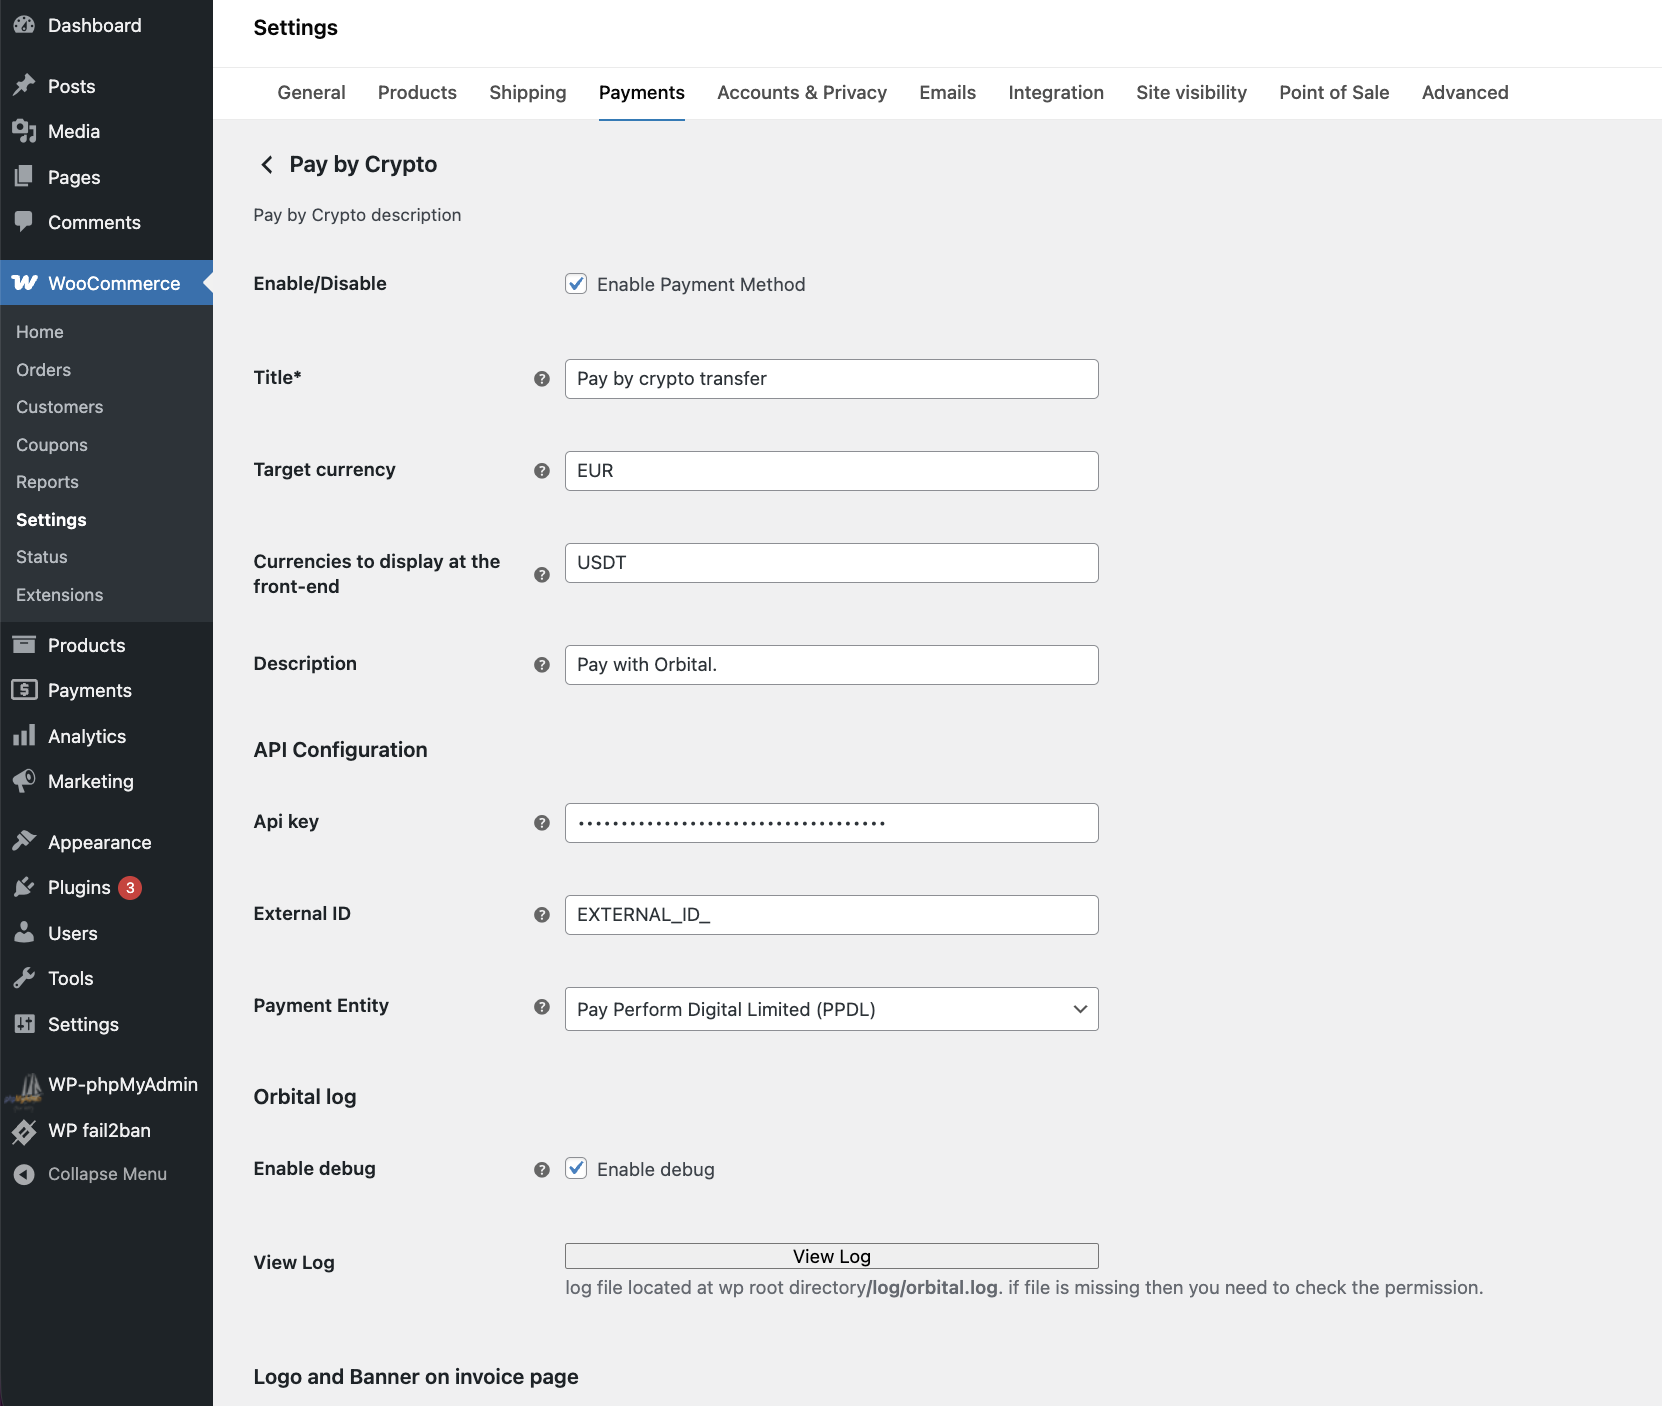
- Configure Orbital payment method in the Dashboard > WooCommerce > Settings > Pay by Crypto – enable.
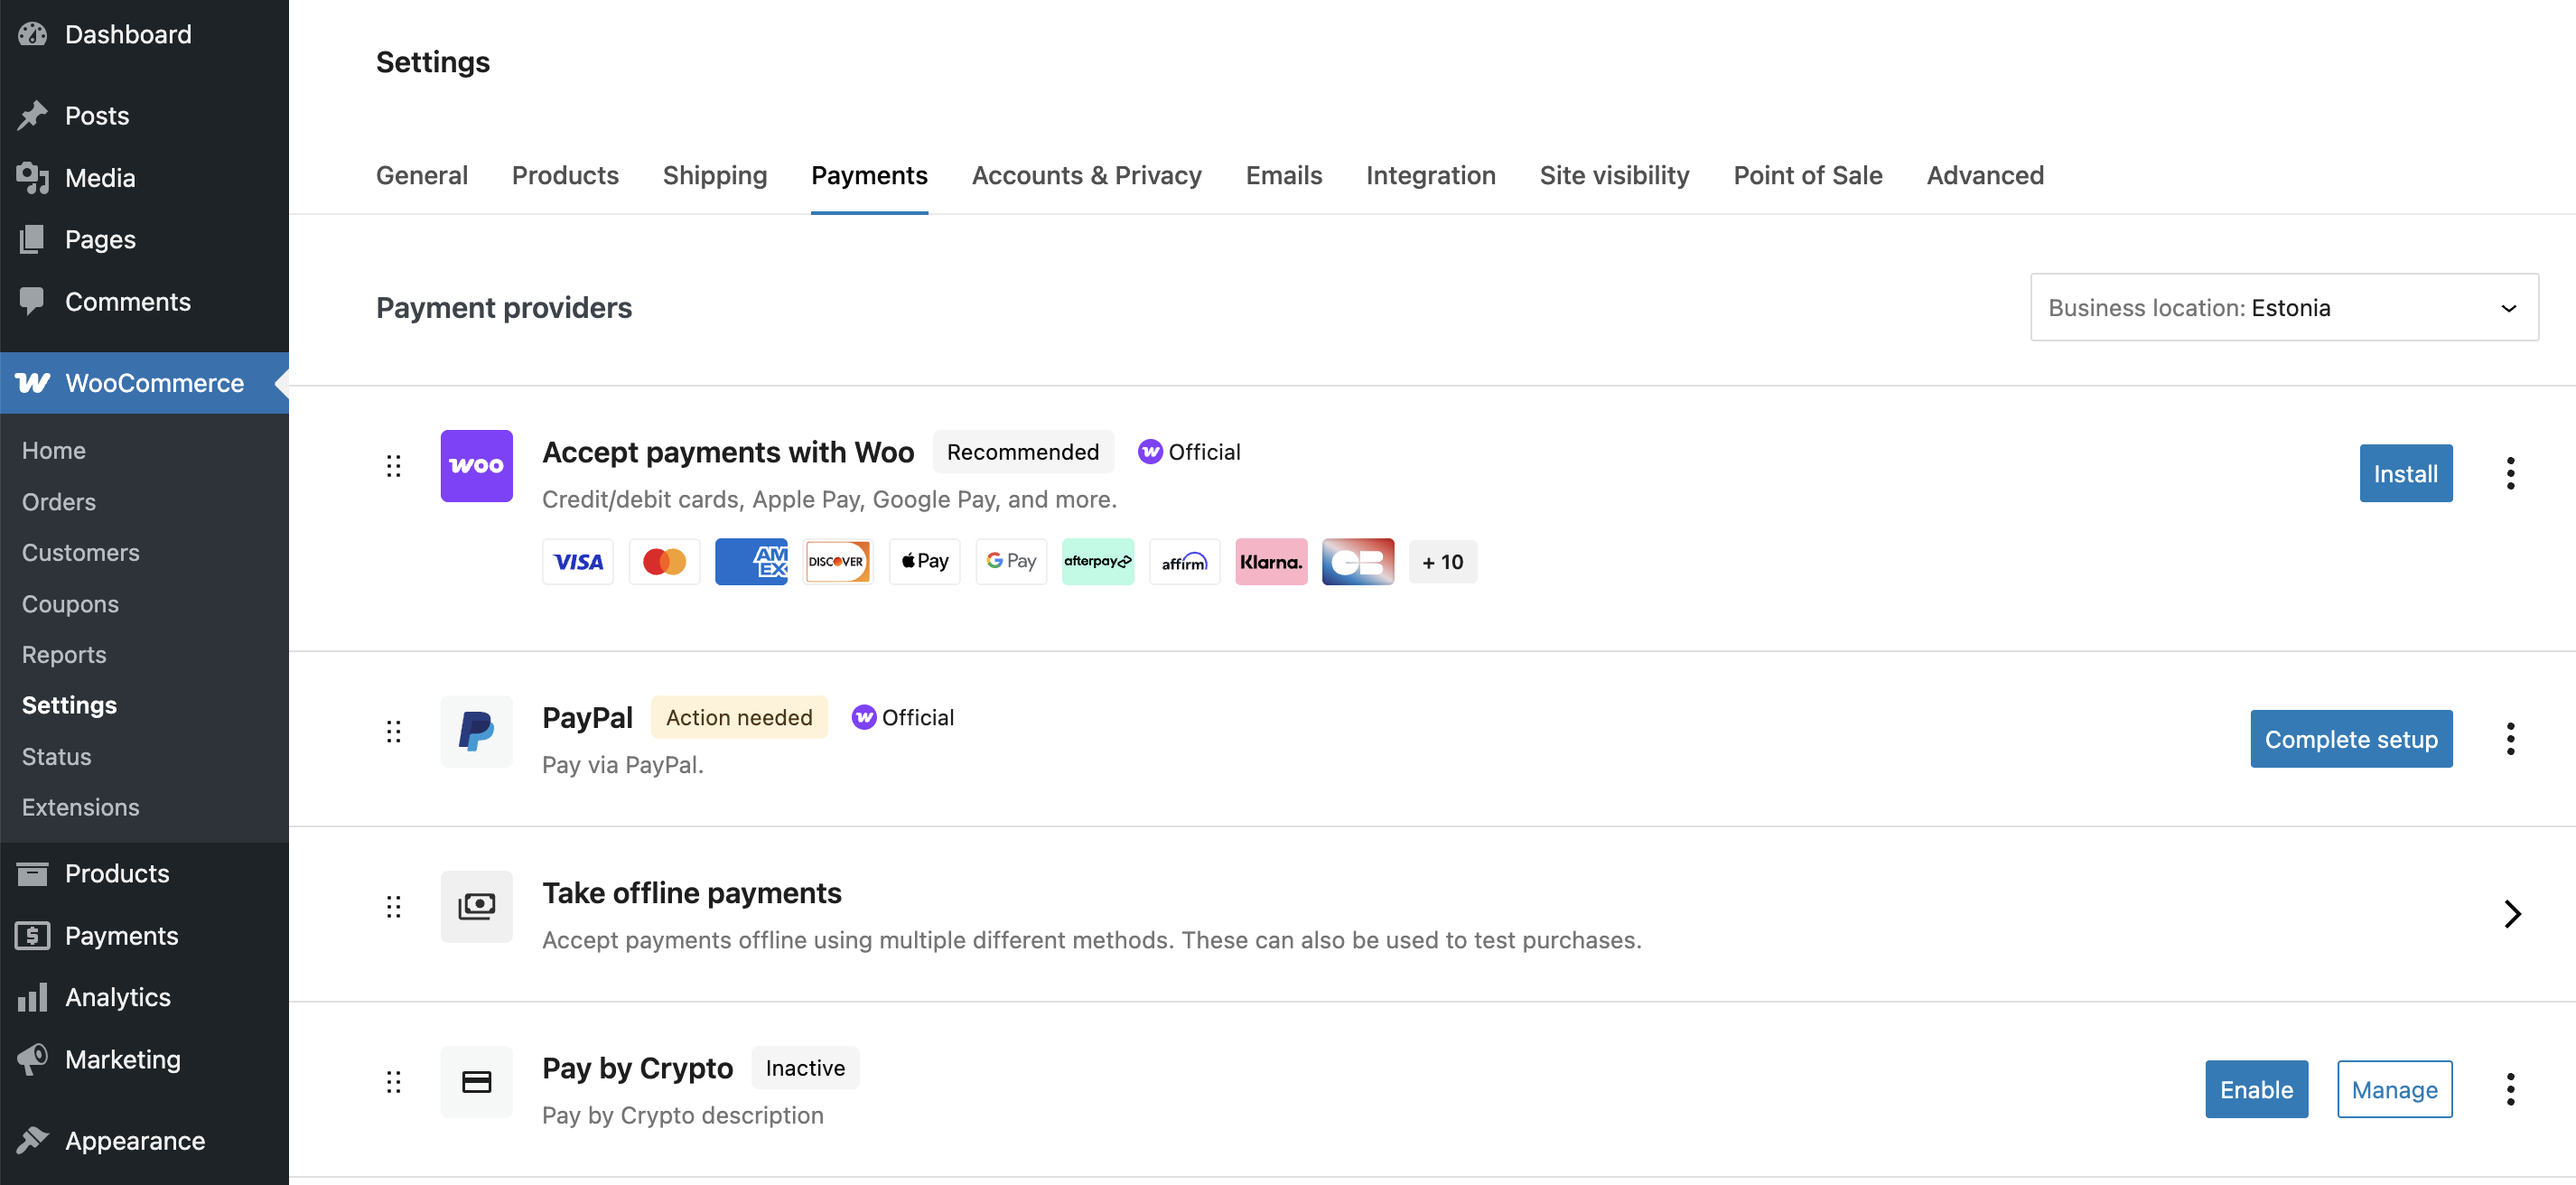
- Once enabled, click on Manage to set up your the following payment fields:
- Title - Add your payment method name as it will appear at checkout (e.g., "Pay by crypto transfer")
- Target Currency - Add your store's base currency (e.g., EUR, USD)
- Currencies to Display at Frontend - Enter the cryptocurrencies available for payment. Separate multiple currencies with commas. For currencies requiring a main currency pair, separate with a space. If no main currency is needed, enter the currency code alone.
Example:
USDT ETH, USDT TRX, ETH, BTC, TST TETHwhereUSDT ETHis USDT on Ethereum network,USDT TRXis USDT on Tron network,ETHis Ethereum,BTCis Bitcoin, andTST TETHis Test token on Test Ethereum network. - Description - Add a custom message for checkout. This controls the description users see during checkout (e.g., "Pay with Orbital.")
- API Key - Generate your API key following the Authentication guide and enter the API key in this field. You'll also need to whitelist your website's IP address in the Client Portal.
- External ID - Enter your unique merchant identifier (provided by Orbital)
- Payment Entity - Select among the two payment entity types to determine which Travel Rule information fields appear during checkout:
- Pay Perform OÜ (PPOU)
- Pay Perform Digital Limited (PPDL)
PPOU and PPDL have different Travel Rule requirements that buyers will need to complete.
- Enable Debug - Check this box to log all API requests and responses. Logs are stored at
wp-root-directory/log/orbital.logand can be viewed by clicking the View Log button in these settings. If the log file is missing, verify directory permissions. Disable debug mode in production environments to prevent large log files from accumulating. - Logo - Upload your logo for the invoice page using JPG format only with a maximum file size of 2MB.
- Banner Image - Upload a banner for the invoice page using JPG format only with a maximum file size of 2MB.
- Click Save changes to apply your configuration.
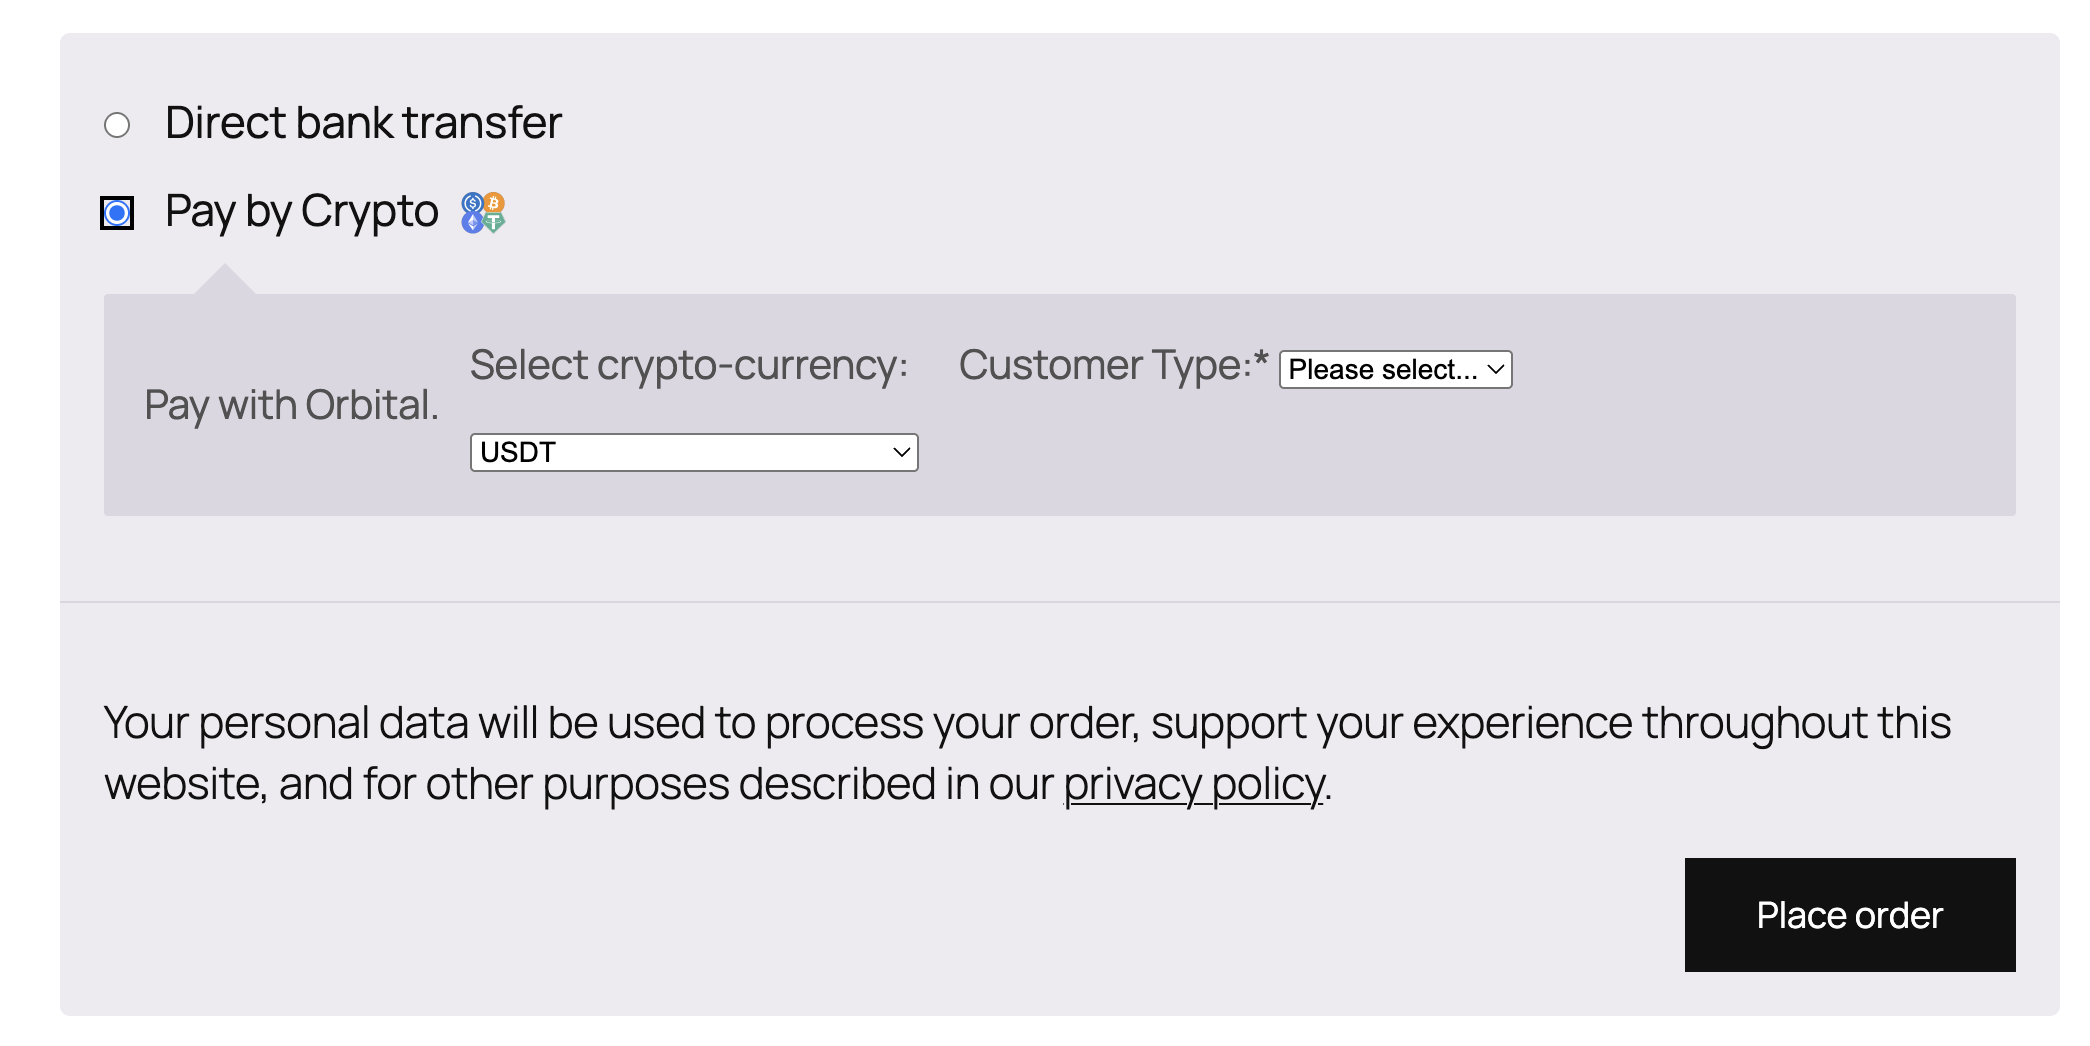
Checkout Process
During checkout, buyers selecting the Orbital crypto payment option will:
- Choose their preferred cryptocurrency from the available currencies
- Select their Customer Type from the dropdown (Natural or Legal Person)
- Complete the required Travel Rule information fields based on the selected Payment Entity
Once all these is filled, they can click Place order to proceed with the cryptocurrency payment. An order confirmation will be sent once the payment is processed.
Support
For technical support or integration assistance, contact your Orbital integration manager.
Updated 9 months ago