
How to Create and Manage Beneficiaries
Beneficiaries are the accounts or wallets you send funds to from your Orbital accounts. Setting them up correctly ensures your payments are routed to the right destination. You can set up both fiat accounts (like bank accounts) and crypto wallets as beneficiaries.
Once a beneficiary is created, you can easily reuse it for future payments, which speeds up your workflow and reduces the risk of errors. Within the Client Portal, you have full control to add new beneficiaries, manage existing ones, and remove those you no longer need.
How to Add a New Beneficiary
- Navigate to Treasury Solutions → Beneficiaries from the left-hand menu.
- Click Create beneficiary to open the Add New Beneficiary dialog.
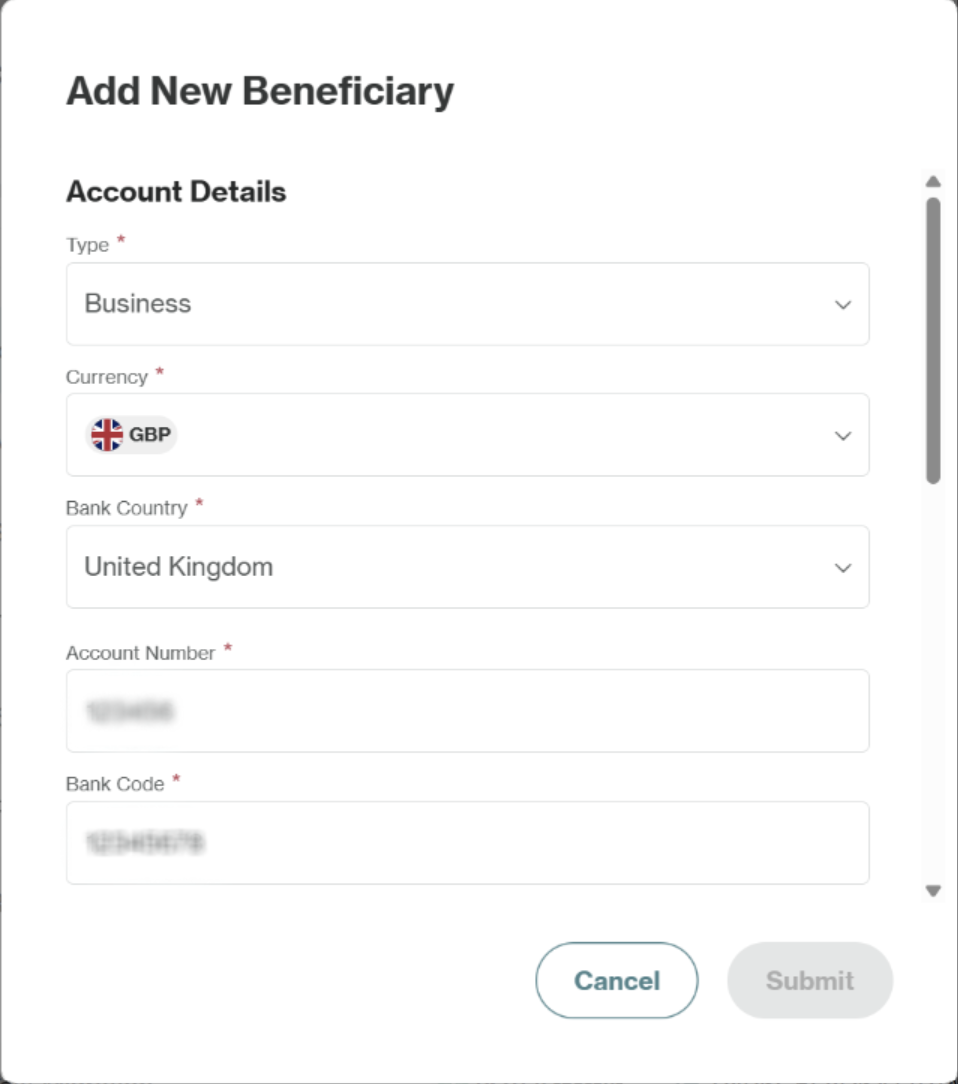
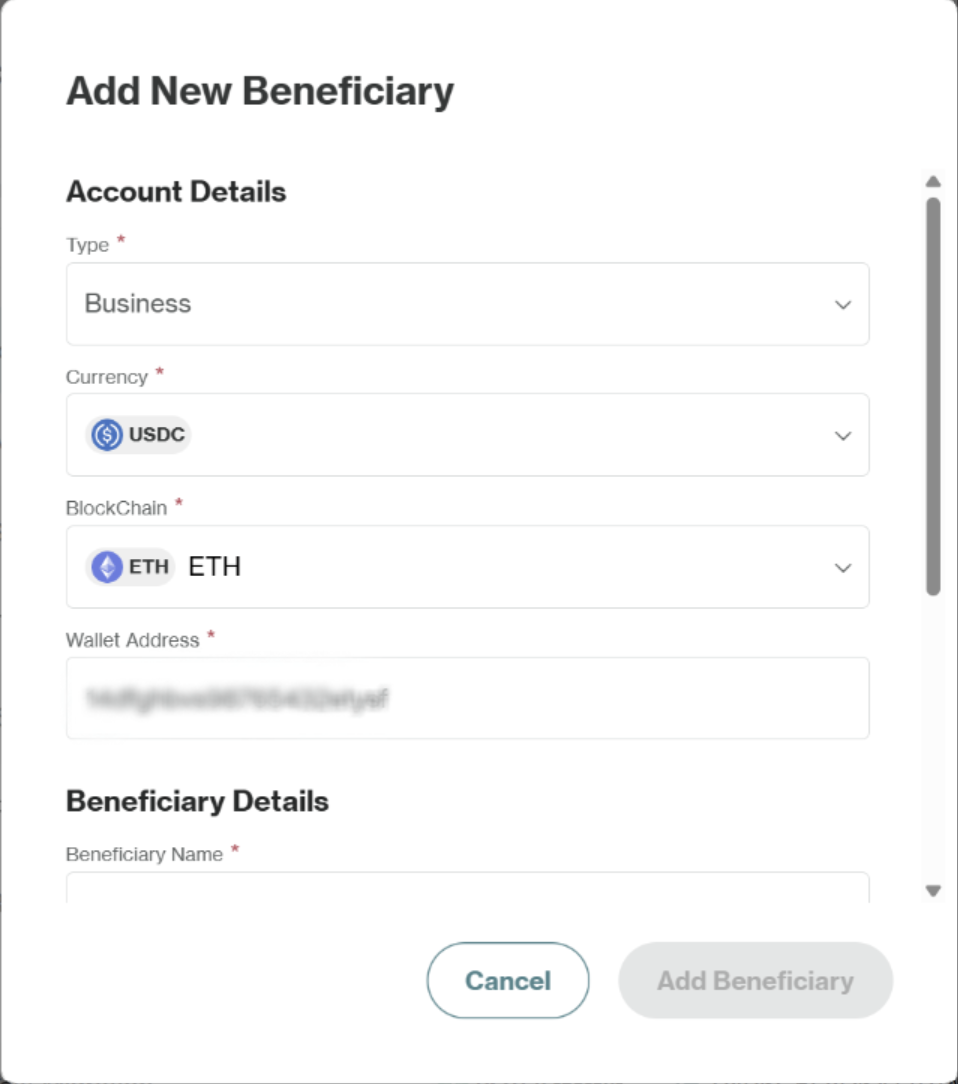
- Select the Type (Business or Individual) and Currency of the beneficiary.
- Enter the required information based on your beneficiary type:
- For Fiat Beneficiaries:
- Select the country of the receiving bank.
- Enter the full account details (e.g., IBAN, BIC, Account Number).
- Enter the beneficiary's personal or business information (e.g., name, address).
- For Crypto Beneficiaries:
- Select the blockchain network for the wallet (if required).
- Enter the recipient’s wallet address.
- Enter the beneficiary's personal or business information (e.g., name, company identifier).
- Once your details is entered correctly, click Add Beneficiary.
- Due to compliance regulations, you may be required to confirm your identity after adding a new beneficiary. This is a necessary security step. Once your verification is complete, the new beneficiary will appear in your list with a "New" status until it is fully verified and active.
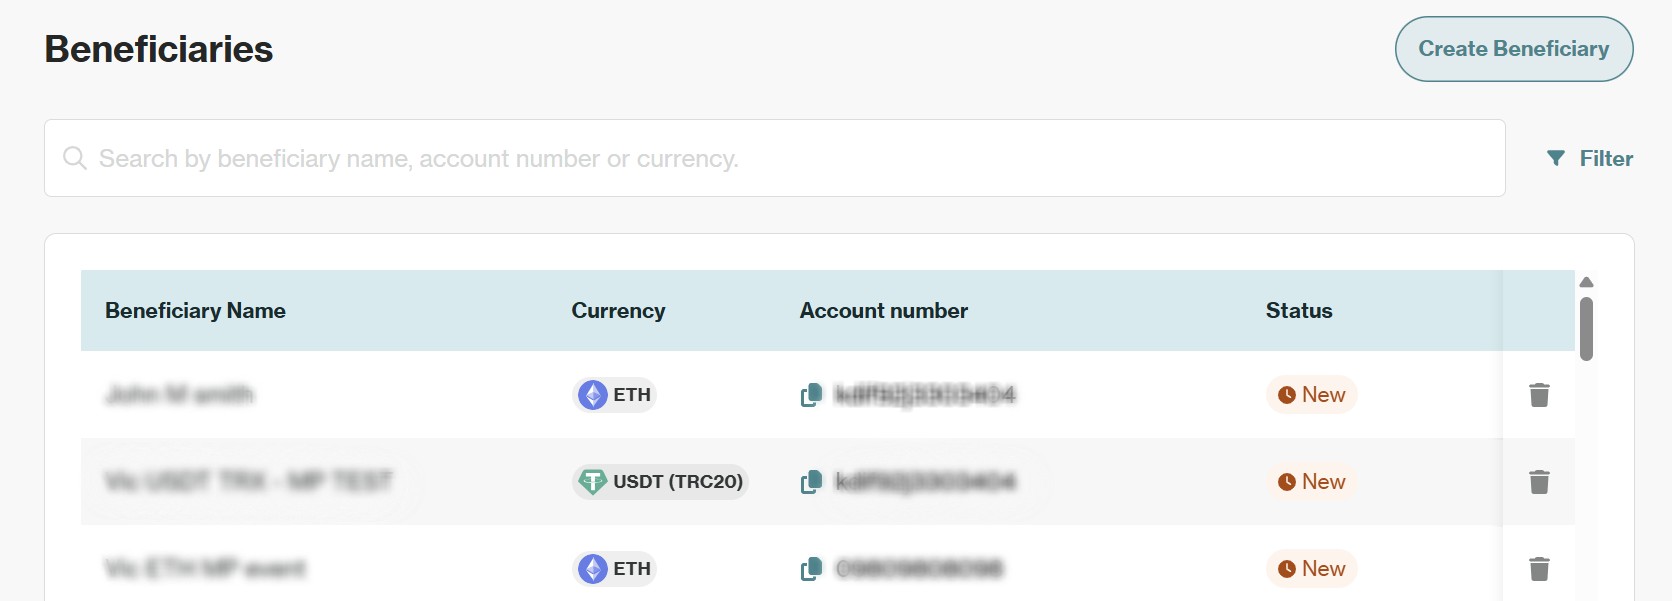
Understanding Beneficiary Statuses
Your beneficiaries will display different statuses depending on their approval stage:
- New: A newly created beneficiary currently being reviewed by Orbital. Payments to beneficiaries with "New" status will not be processed until approved.
- Approved: An Orbital-approved beneficiary ready for payments.
- Rejected: The beneficiary has been rejected by Orbital. Any pending payments to rejected beneficiaries will be cancelled.
How to Delete a Beneficiary
When you need to remove outdated beneficiaries or clean up your payment destinations, you can delete them from your account. Keep in mind that this action cannot be undone, if you need to use the same counterparty again, you'll need to re-add them as a new beneficiary.
You cannot directly edit existing beneficiary details. To modify information for an approved beneficiary, you must delete the existing record and create a new beneficiary with the corrected details.
- In the Beneficiaries table, find the beneficiary you want to delete. You can use the filter options to help locate them if needed.
- Click the trash can icon next to the beneficiary's entry. A confirmation dialog will appear. Click "Delete Beneficiary" to permanently remove it from your list.
By following these steps, you can efficiently manage your beneficiaries in the Orbital Client Portal, ensuring accurate and secure payments for all your transactions.
Updated 7 months ago